 Download Help PDF (29MB) | Search:
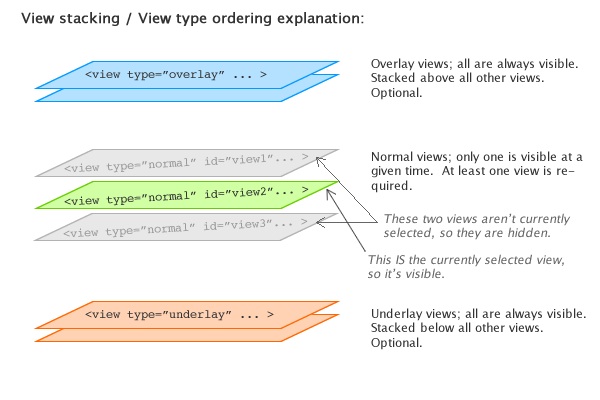
Slideshow layouts are made up of one or more "screens" which are referred to as views. There are three different view types:
The following diagram provides a visual representation of how views function:
Within the Layout / Presentation section is the View Management Bar, located just below the Design Area:
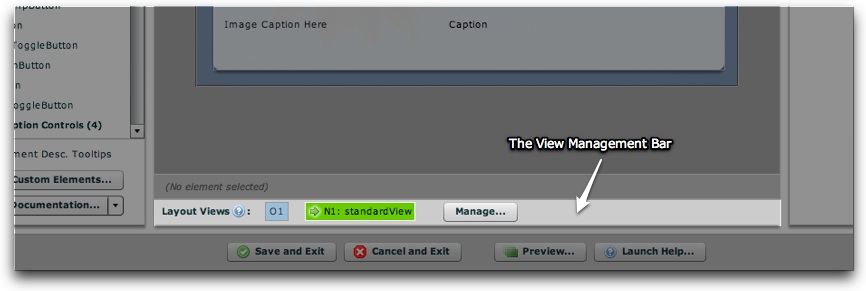
Here is a diagram explaining the various parts of the management bar:

As noted in the photo, here is some information about the various aspects of the bar:
To select a view for editing, click on its box once. Only one view is visible at a given time in design view to prevent confusion. The selected view is a brighter color in the bar; all other unselected views are grayed. To make changes.
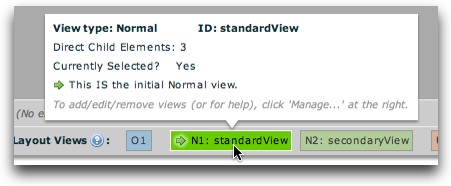
Hovering over one of the view boxes will display more information about that view. Here is an example tooltip for a Normal view:
And an example tooltip for an Underlay view:
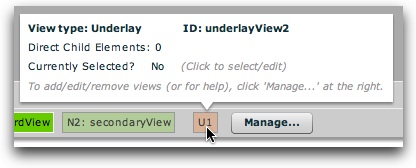
Information in these tooltips includes:
Tip: If you have defined more than one Normal view, you can change which one is opened initially directly from the View Management Bar (without launching the View Management dialog). To do so, right-click on the view you want to be initial and select 'Make this the initial view':

Tip - Understanding the 'Initially-Opened Layout View' setting: Only one Normal view is visible at a given time in the slideshow. When you create more than one Normal view, therefore, you must specify which one of these will be initially visible.
The View Management Dialog
Click the 'Manage...' button to launch the View Management Dialog. This is where you'll create, modify, and remove views. The dialog appears as follows:
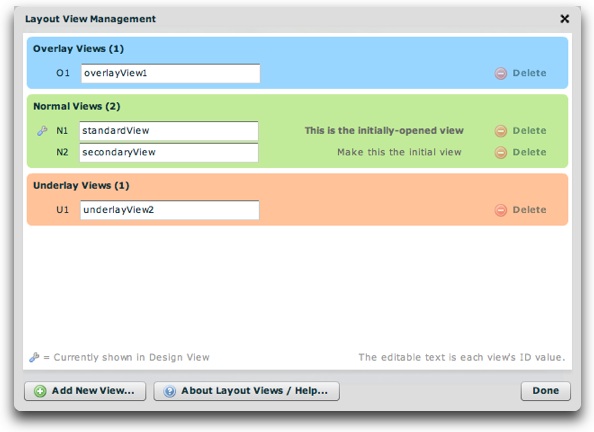
A visual representation item is shown for each view, grouped by view type. The editable text box represents the view's ID value (only required for Normal views). This ID value is used to identify the view when changing between Normal views. Therefore, you should enter a meaningful name for each Normal view, and not modify it if you have referenced it elsewhere (e.g. in a LayoutJumpButton element).
The small wrench icon indicates which view is currently selected for editing in Design View. For normal views, you can change which is initially displayed by clicking the 'Make this the initial view' button next to the view you want initially displayed.
To add a new view, click the 'Add New View...' button:

The following prompt will open:

You'll enter the view type (Normal, Overlay, or Underlay), reference ID, and -- if the view type is Normal -- whether the view is initially displayed. Then, click the Add View button to add the view.
To remove an existing view, click the Delete button on the right:
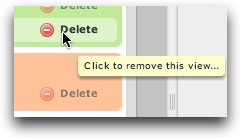
If any child elements have been added to that view, you will be asked to confirm the deletion.
Note: This sub-section is only for advanced users and developers; beginners can skip over it.
You can specify the initial view by three different means, with each method overriding the methods listed before it.
At runtime (when your slideshow has been deployed), you can provide buttons to allow the user to switch between different Normal views (if you have defined more than one Normal view). This is done with the LayoutJumpButton element (in the Slideshow Control Buttons folder). This is a simple button which, when clicked, changes the current layout view. You will use the Properties Panel to specify the label for the button, as well as the view which will open when it is clicked. Here is an example of a layout jump button in action:

When the user transitions between views, a transition effect can be optionally played. These effects can be simple fades or complex ones such as a rotating cube. This is controlled in the wizard by using the Layout Transition Settings pod within the Global Configuration and Playback Settings section. See Using the 'Global Configuration and Playback Settings' Section for more information.
Note for Advanced Users & Developers: For more information about controlling the layout transition programmatically, see the LayoutManager class reference mentioned below in the 'Corresponding XML Structure' section.
There are a number of special parameters which can specified for each view. These parameters must be passed through the XML, by adding attributes on the appropriate view node. To learn more about these options, see the com.dwuser.ss4.ui.LayoutManager class reference within the API Reference. Here is a brief overview of the various options which can be controlled:
To learn more about the implementation of one of these specific options, see the reference mentioned above. Note that these modifications require familiarity editing XML, and are only recommended for advanced users and developers.
For information about the XML structure behind layout views (and the user interface in general), see The <ui> section - User Interface within the Developer Reference. Also be sure to see the com.dwuser.ss4.ui.LayoutManager class reference within the API Reference.