DWUser.com
Empowering Web Creativity
Support Center - Hummingbird Photo Gallery for WordPress
On-Demand Support Options
Resources to help you get started and use the Hummingbird Photo Gallery for WordPress:
Plugin Installation and Activation
To get started, you need to install the Hummingbird Photo Gallery plugin into your WordPress site:
- Download the latest demo plugin package from here or, if you purchased the full version, the latest full version from your account.
- Open the WordPress admin dashboard on your site and select Plugins > Add New. Choose the Upload tab, then select the .zip file you just downloaded. Click Install Now and follow the on-screen instructions.
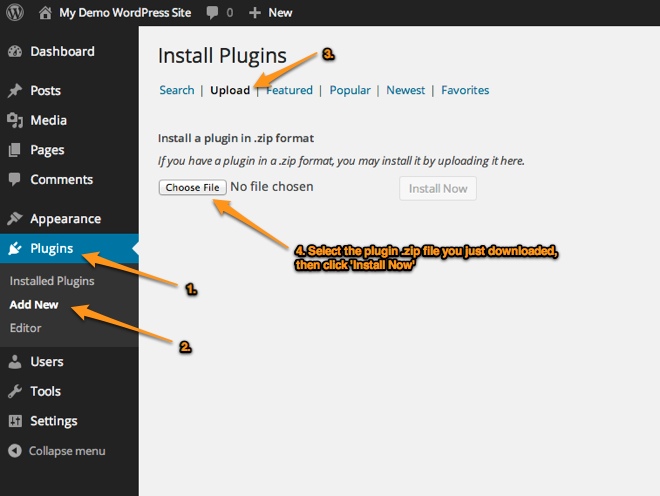
- When prompted, click the Activate option to activate the plugin.
If you have any trouble with the installation, try installing manually.
Creating a Gallery Page
Now that you have fully installed the plugin, you're ready to start creating galleries! Galleries are created as pages that use the special Hummingbird Photo Gallery template.
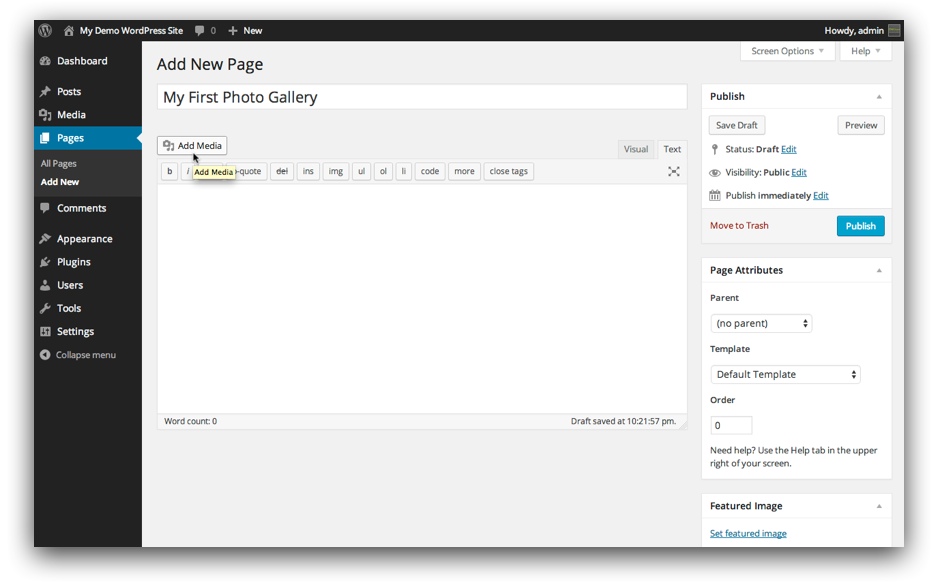
To create your first gallery, select Pages > Add New in the WordPress dashboard. Set the title of your new page as desired, then click the Add Media button to begin adding a media gallery to your page:
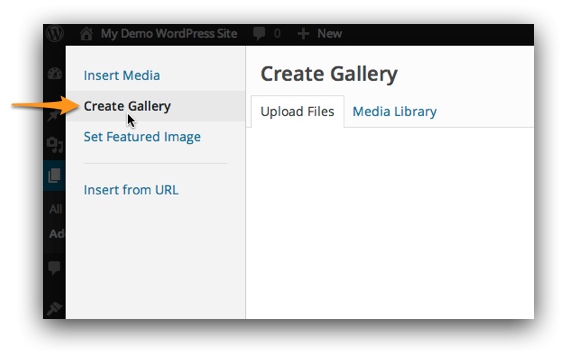
In the Add Media dialog, select the Create Gallery tab in the top left:
Then, you can use Upload Files to upload your photos or Media Library to select photos that are already in your WordPress media library. For best results, you should use photos that have been resized to about 1200x900 pixels; this will usually yield a good balance between quality and loading speed. This is a general recommendation, so different values may better suit your project. Once any new files have been uploaded, you'll be able to visually the select photos in the Media Library tab by clicking on them:
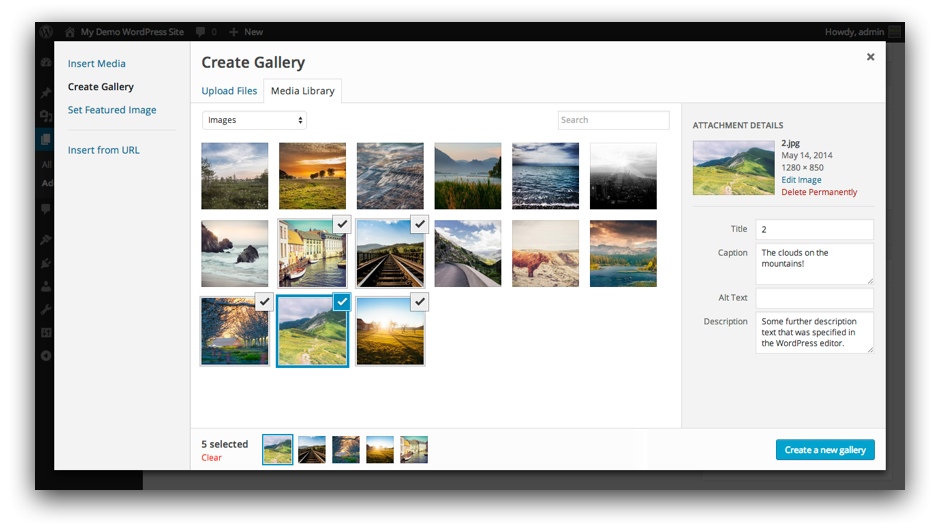
When a photo is selected, you can optionally set its caption and description in the text boxes on the right. These text values will appear in the photo's info box in the finished photo gallery (unless text display is disabled).
Once you've selected the photos you want and specified any captions or descriptions, click the Create a new Gallery button in the bottom right to proceed to the edit screen where you can re-order photos as desired:
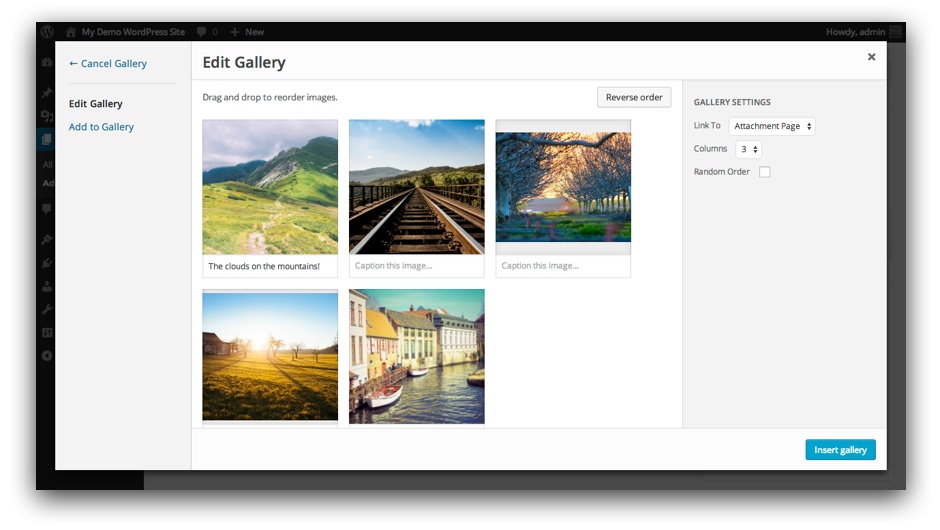
Drag and drop to re-order the photos. If you wish to randomize the gallery order each time it is viewed, check the Random Order box on the right. You can also easily make any caption changes in this screen. When the gallery appears as you want, click the Insert Gallery button in the bottom right to add the gallery to your page.
The gallery will appear in the editor:
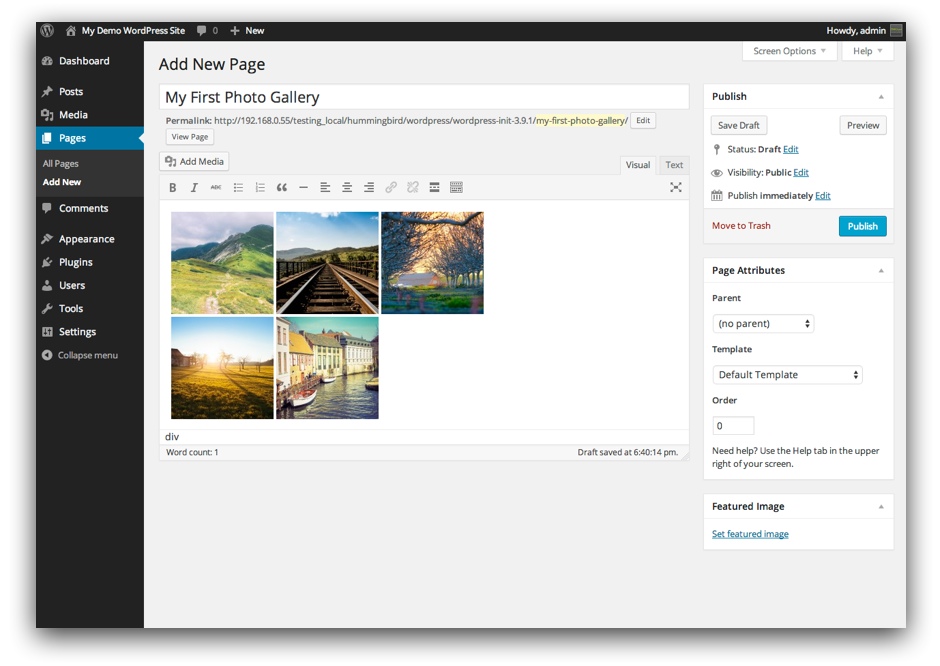
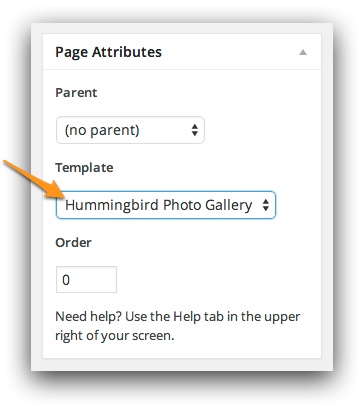
Now, to convert this page into a Hummingbird photo gallery, locate the Page Attributes box on the right and set the Template to Hummingbird Photo Gallery:
A gallery settings box will appear beneath the page content editor:
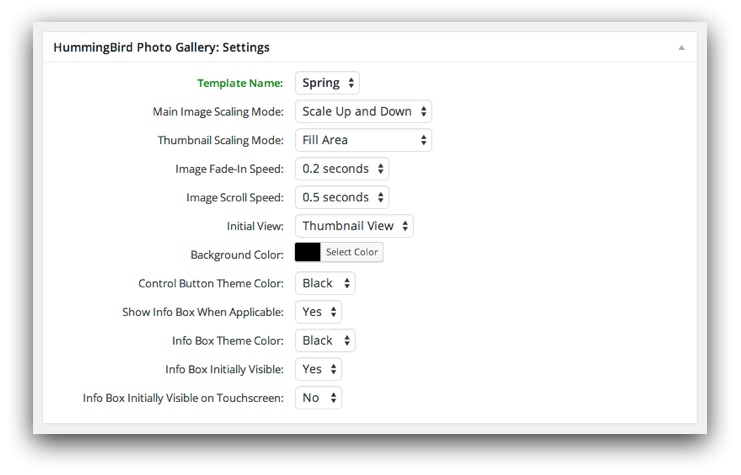
You can optionally use this box to customize the appearance and behavior of the gallery; for example, you can change the background color, image scaling mode, or initial view.
To view your gallery, use the Preview button or Publish it and then use the View Page button.
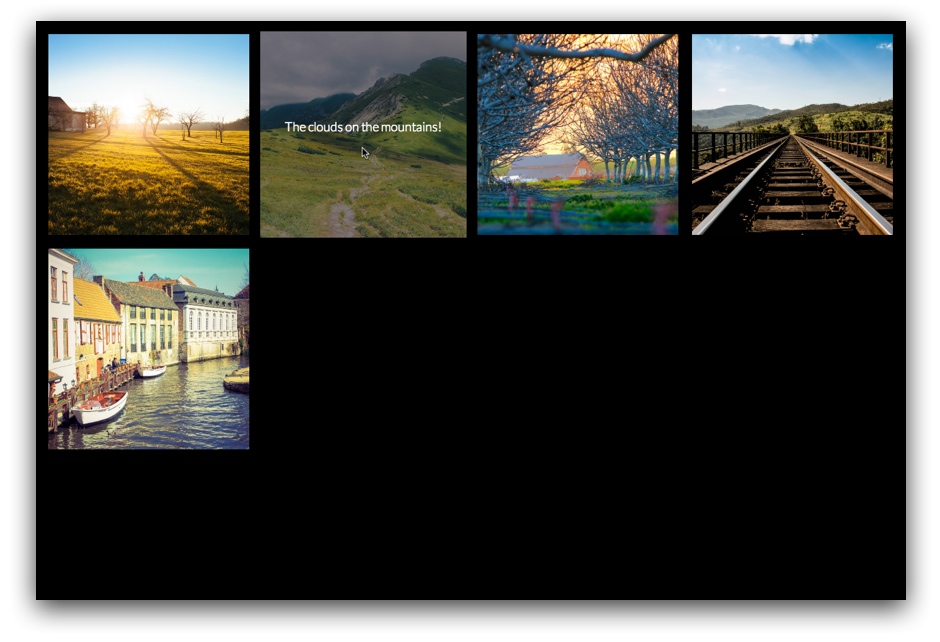
You can link to this page as you would to any other page.
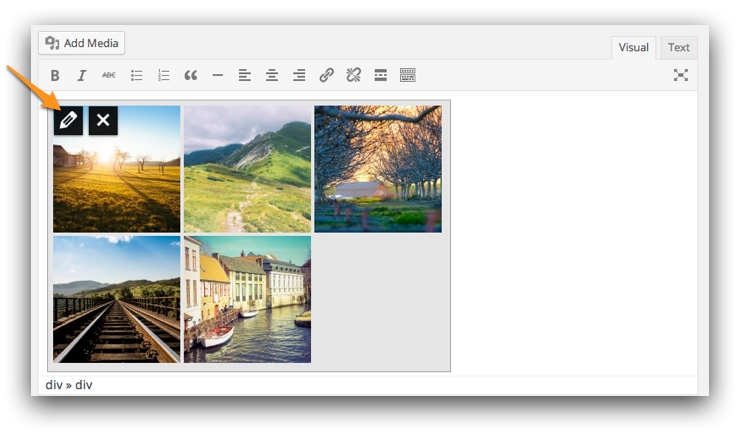
To later make edits to the photos in your gallery, click on any of the photos in the page editor and use the pencil icon to launch the editor:
Switching from the Demo to the Full Version
If you've tried out the demo version of the plugin and now wish to use the full version, purchase here and download the latest package from your account. In your WordPress dashboard, go to the Plugins page and disable the demo Hummingbird plugin. Repeat the plugin installation instructions above using the new file you downloaded a moment ago. Once you've confirmed that your Hummingbird galleries appear as expected, remove the demo plugin altogether via the Plugins page.
We're Here to Help!
If you have any questions about using the Hummingbird Photo Gallery for WordPress, please let us know by opening a support ticket below. Please also let us know if you found anything in this documentation confusing, so we can improve it.
Interactive Support Options
Can't find an answer in the on-demand options? Try interacting with other users on the forums or contacting support: